Open topic with navigation
Creating Work Orders
During creation of a work order or soon afterward, you need to assign it to a specific location, assign it a job code and assign it a priority and/or PHAS (Public Housing Assessment System) code, employee or crew, and schedule a date and time for the work to begin. Some agencies use radios or phones to dispatch employees who are already in the field. You may also print one or more copies of the work order for your employees to take to the job, or for the tenant to have.
Note: Some of the fields described are used by housing authorities that do not add work orders until AFTER their employees have completed them. Skip any (not required) fields, as necessary, and as fits your agency's process.
Access Work Order (New) Tab
|
1.
|
In the Home tab menu, click Call Center (under the Work Order heading). The Work Order (New) tab opens. |
Specify WO Location
The available developments, buildings, and units are your agency-defined lists which you maintain in the Setup area of the Tenant Accounts Receivable and Occupancy and Rent Calculation programs.
|
2.
|
Select the appropriate data area and development in which the work order occurred from the drop-down lists. |
|
3.
|
To associate the work order with a building/project, select the building. |
|
4.
|
To associate the work order with a unit, select the unit or click  to search for the unit. The Unit Search screen appears where you can search for and select the unit. After selecting a unit, the current tenant information automatically displays on the Work Order (New) tab. to search for the unit. The Unit Search screen appears where you can search for and select the unit. After selecting a unit, the current tenant information automatically displays on the Work Order (New) tab. |
- After selecting a unit, if the unit has other open work orders, the following icon appears:
 . Click this icon to view the other work orders on the Work Order Search screen.
- If the tenant gave permission to enter, that checkbox will be checked. Uncheck, if necessary.
Hint: You can also filter the list of developments, buildings, or units by typing text directly into the drop-down list fields.
Select Job Code
This step allows you to enter information about the work your employees need to do. It also allows you to assign the work order to a crew and/or an employee. Although this step is not required, you will usually complete it when you create the work order.
|
5.
|
Click  . The grid at the bottom of the screen becomes available for editing. . The grid at the bottom of the screen becomes available for editing. |
|
6.
|
Select the job code for the work being requested from the drop-down list. You can type the first few letters of the job code into the job code textbox and the list will sort automatically. |
- This is a list of your agency-defined list of job codes, which you maintain in the WinTen² Work Order program.
|
7.
|
Enter the work requested and work performed. Select within the fields and a text area appears where you can type in the appropriate comments. After typing the comments, click OK to save and apply the text: |
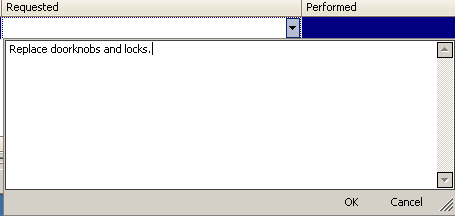
- Work requested is a detailed list or description telling your employees what they need to do. Work performed provides default completion information, which makes it easier to complete the work order. These fields will typically appear on all printed copies of work orders.
|
8.
|
Specify the cause of the work order. |
- This is your agency-defined list of work order causes, which you maintain in the Setup area of the WinTen² Work Order program.
|
9.
|
Select the employee and/or crew who completed/will complete the work order.These fields list the crew and/or employee assigned to the currently selected job code. |
- These are your agency-defined lists of work order employees and crews, which you maintain in the Setup area of the WinTen² Work Order program. Your agency also has the option of setting defaults for the assigned to crew and/or assigned to employee fields for any job code, so these values may have populated automatically.
Hint: To clear/delete a job code, scroll all the way to the right of the Job Code grid and click  in the grid row of the job code you want to delete.
Enter WO Details
Only the PHAS code is a required selection. You can only have one priority, one PHAS code, and one work order type per work order.
|
10.
|
Select a work order type, priority and PHAS codefrom the drop-down lists. |
Note: These selections could have a listed default depending on if the job code was previously set up with a default priority, PHAS code, and WO type. However, these defaults can be changed here.
- These are your agency-defined lists of work order types and priorities, which you maintain in the Setup area of the WinTen² Work Order program.
|
11.
|
Select the status and source code of the work order. |
- The Status field offers your agency-defined list of work order statuses, which you maintain in the Setup area of the WinTen² Work Order program. Statuses indicate what “state” a work order is in. Typically, most work orders go from New to In Progress to Completed to Posted. You will usually wait to change the status of shorter jobs until you complete the work order. For longer jobs, you may choose to indicate that work has begun and is still in progress. To do this, enter the start date and time and then change the status to one of your agency’s “In Progress” statuses.
- The Source field offers your agency-defined list of codes identifying from where a work order originated, such as “tenant generated” or “preventive maintenance,” which you maintain in the Setup area of the WinTen² Work Order program.
|
12.
|
Enter the account number, if applicable. |
|
13.
|
Specify if the unit has a smoke detector or if it needs replaced. |
|
14.
|
Select the reporter. This is usually the tenant or the tenant’s relative. |
|
15.
|
Specify the scheduled date/time, or when your employees should start work on the work order. This defaults to today's date and current time but can be changed. |
|
16.
|
Select the dispatch information: dispatch to, dispatch method, and dispatch date/time. |
- The Dispatch To field is your agency-defined list of work order employees, which you maintain in the Setup area of the WinTen² Work Order program.
|
17.
|
Specify the requested date/time and started date/time.The start date and time indicates when your employees actually began work. For shorter jobs, you will usually wait to enter this until you complete the work order. For longer jobs, you may choose to indicate that work has begun and is still in progress. To do this, enter the start date/time and then change the status to “In Progress”. |
|
18.
|
If the work order has been printed, check the checkbox. |
|
19.
|
In the comments area, enter any notes on the actual problem to provide the worker with additional information to fix the problem, or notes about the work order in general (for example, “Knock loudly - tenant hard of hearing”). |
Note: If applicable, the tenant charge, total PHA cost, and due date of the work order will display on the screen and is not editable. The user name of the person logged in and entering the work order information will display in the Created By field.
Save
|
20.
|
Click  to save the new work order record. A work order number is automatically assigned and now displays at the top left-hand corner of the screen. The work order record is also now available to work with in the WinTen² Work Order program. Once the work order is completed and finalized, you can then return to the work order record in the WinTen² Work Order program to enter the final details, such as employee time, items used, and any tenant charges. to save the new work order record. A work order number is automatically assigned and now displays at the top left-hand corner of the screen. The work order record is also now available to work with in the WinTen² Work Order program. Once the work order is completed and finalized, you can then return to the work order record in the WinTen² Work Order program to enter the final details, such as employee time, items used, and any tenant charges. |
Print WO Form
|
21.
|
If you want to print the work order form, click  . . |
Hint: To exit out of an individual screen or tab, you can click  on the toolbar, or
  next to the screen/tab name. You can also use the Escape (ESC) key on your keyboard. (If you haven't saved any changes before exiting, a message will appear asking if you'd like to save before closing.)
Copyright © Tenmast Software 2011